Advanced Custom Fields changed my life. At least in terms of using WordPress as a full blown CMS instead of just a blogging platform. Sure we were able to add custom fields before, but, to a user, they were ugly and unintuitive. ACF on the other hand gives us flexibility and control to add fields images, text, WYSIWIGs, and more directly into the post page. Which keeps the client happy and cuts down on the number of times we have to explain how to change their header text. Always a plus.
Not only do we get a great interface for the user, but it’s super easy for development as well. Going back over all the WordPress sites I’ve built in the last two years I can’t think of one that didn’t use Advanced Custom Fields.
You’re going to want some basic knowledge of theme development and PHP to really get into the meat of ACF, but with a little bit of effort anyone should be able to implement ACF into their theme.
Getting Started with Advanced Custom Fields
Advanced Custom Fields comes in a few flavors these days. You’ve got your free version and your Pro version. The free version is perfect if you’re just looking to add some fields for a title or maybe a header image or some other basic data. With the Pro version you’ll have the full set of tools to create repeater fields and flexible content. It is very worth the $25 AUD for a single site, and the $100 AUD if you’re a developer.
Once you’ve chosen your version of ACF go ahead and install it. If you’re going with the free version you’ll be able to install from your Plugins page in the Dashboard. If you’re going Pro, you’ll be able to download it from ACF after checking out. You’ll want to unzip and drop the “advanced-custom-fields-pro” folder into your /wp-content/plugins directory. Then you’ll have to activate through the Plugins panel in your Dashboard. After you activate you’ll want to enter your license key by going to Custom Fields > Updates and pasting your key in the License Key field.
[ad id=”2″ slot=”7569185153″ width=”300″ height=”250″ align=”center”]Creating Your First Field
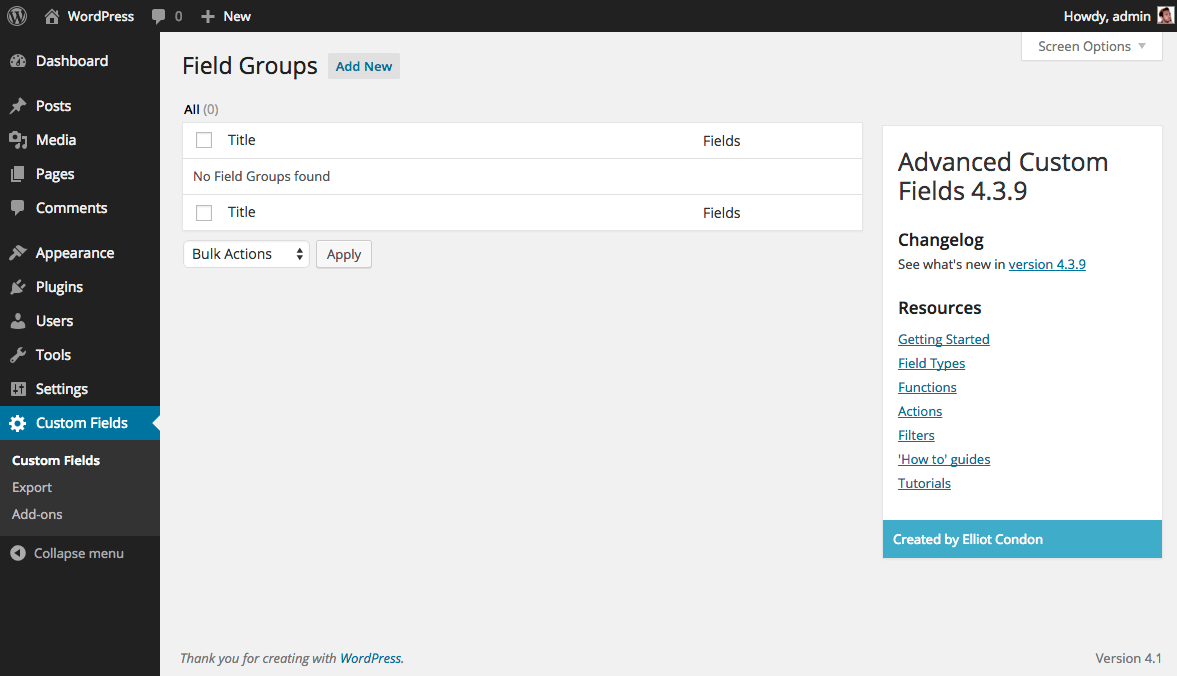 Once you’ve activated the plugin you’ll see the Custom Fields menu near the bottom of your WordPress Admin nav.This will be your home.
This is where you’ll be able to create your custom fields. So let’s get started. Click Add New at the top to create your first Field Group.
First, you’ll want to give your Field Group a title. Here, we’ve gone with Awesome New Fields. Under the Field Group title you’ll see 3 panels. The first is going to hold all your fields. The second is for setting the location rules for your field group. The third gives you some options for how your fields will appear when editing posts and pages. For now, select + Add Field to create your first field.
The first thing you’ll want to set is your Field Label. This should be human readable, as it will show on the edit page. Let’s make a basic sub title to show under our main post title and call it Secondary Title. The next field, Field Name, is what you’ll use in your template to pull the data from your field. As soon as you hit tab or click out of the Field Label the Field Name will autofill in with the proper formatting you’ll need for your theme. Don’t worry. If you made your Field Label really long you can edit your Field Name. Remember, you can’t use spaces but can use dashes and underscores. I prefer underscores1, but you’re welcome to do whatever you like here.
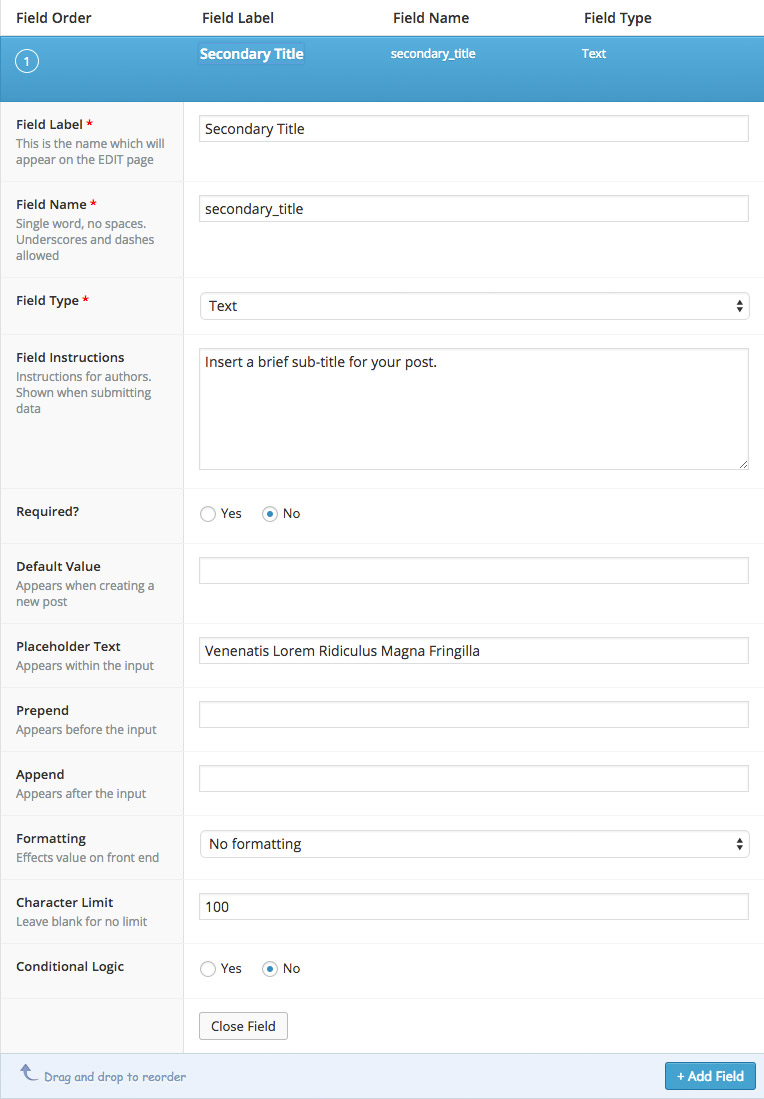 The next item may be the most important. The Field Type is where you select the type of field you want to create. To keep things simple for now we’ll just do a Text field. You can do images, checkboxes, radio buttons, and if you went Pro, repeaters and flexible content. Read through the rest and you’ll get a pretty good idea of what they do. We’re just going to add in some brief Instructions, Placeholder Text, a Character Limit of 100, and Formatting of No Formatting2.
As we move down to the Location panel you’ll see 3 dropdowns for adding fields to a certain page, post, or post type. We’ll keep things simple for now and leave it as is. That should read Post Type is equal to post.
Finally, under the third Options panel we’ll just hide some items to show how easy Advanced Custom Fields makes it easy to control what your user sees.
Let’s make our Secondary Title appear under the title. We’ll leave it with an Order No. of 0 then set its Position to High (after title). Then give it a the Style of Standard (WP metabox) to give it that nice default WordPress metabox feel3. Finally, just for fun we’ll hide the Excerpt, Discussion, Comments, and Author fields. These options come in handy if you want to simplify your user’s post editing experience.

Now, scroll back up and hit publish.
Congratulations. You just created a custom field for a sub-title. Let’s use it.
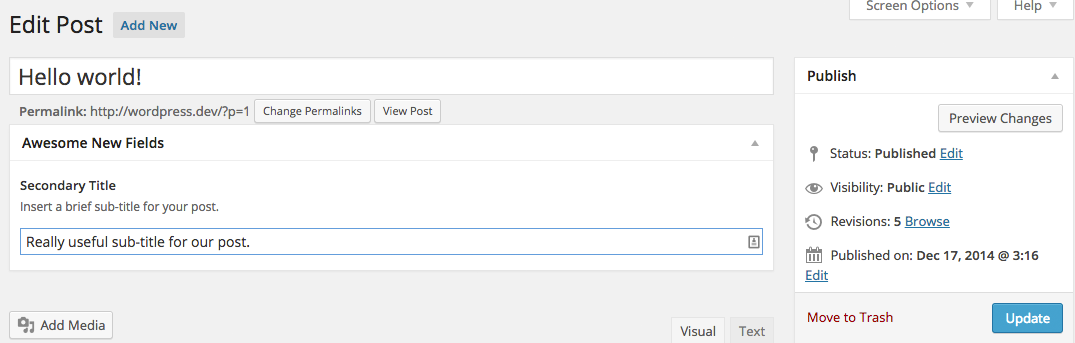 If you go create a new post you should now see your new custom field directly under your post title. Enter a nice little sub-title and hit update.
There is still one more thing we have to do though. We need to pull the filed into our theme using ACFs built in functions. In this case I’m going to be editing the Twenty Fifteen theme. You’ll probably want to know a little bit of PHP at this point, or at least not be completely freaked out by it.
The file we need in Twenty Fifteen is going to be content.php in the wp-content/themes/twentyfifteen/ directory. If you’re using a different theme you’ll want to find where your theme is calling the_title(); . Your home page is likely going to be something like index.php, front-page.php, or home.php. Your single post page is going to be single.php. If you’re lucky, the theme will make use of a content.php file or something similar to pull in the title to both the home page and single page, like Twenty Fifteen does. That way we’ve only got to make one small edit.
Now we’ve got our file open and located the call to the_title(); . In Twenty Fifteen you’ll find this inside content.php on lines 19-27.
<header class="entry-header">
	<?php
		if ( is_single() ) :
			the_title( '<h1 class="entry-title">', '</h1>' );
		else :
			the_title( sprintf( '<h2 class="entry-title"><a href="%s" rel="bookmark">', esc_url( get_permalink() ) ), '</a></h2>' );
		endif;
	?>
</header><!-- .entry-header -->
Twenty Fifteen runs an if check to see if we’re on the single post page in which case it returns an unlinked H1, or if we’re on another page we’ll use a linked H2. For our purposes we’re going to add our code right before the closing </header> tag. That code is:
<h2 class="sub-title"><?php the_field('secondary_title'); ?></h2>
So once we paste that into content.php we have:
<header class="entry-header">
	<?php
		if ( is_single() ) :
			the_title( '<h1 class="entry-title">', '</h1>' );
		else :
			the_title( sprintf( '<h2 class="entry-title"><a href="%s" rel="bookmark">', esc_url( get_permalink() ) ), '</a></h2>' );
		endif;
	?>
	<h2 class="sub-title"><?php the_field('secondary_title'); ?></h2>
</header><!-- .entry-header -->
Now, I added a little bit of CSS to set the margin-bottom of the .entry-title class to 0 and give our .sub-title a margin-bottom of 1.5em. You can do this within style.css. After that minor adjustment we’ve got our sub-title.

If you’ve got any issues feel free to leave questions in the comments below. In the coming weeks I’ll cover some of the other field types within Advanced Custom Fields.
- As does ACF by default.
- We don’t want our user to be inputting HTML into our sub-title.
- Feel free to test out the other style too and compare what they return.
