So you want to start a podcast. You and your friends would always get kind of buzzed and talk about starting one, but never get around to it. But then one fatal Thanksgiving night, after you were loaded up on turkey, football, and several hours of drinking, you stumble across a Yeti microphone on Amazon’s early Black Friday deals and can’t help yourself. Two days later1 there is a knock at your door, and now you either need to start a podcast, or you just bought a really nice paperweight.
Whether you’ve got a WordPress site or you’re looking to set one up to start your podcast2 this guide will have you up and running in no time. All you will need is a WordPress site, a free plugin, a computer capable of recording, and some recording software.
Podcasting Equipment
Let’s just assume you’ve already got a WordPress site up and running with the theme of your choice. The next thing you’ll need to do is get to actual recording. I’d recommend a decent mic. You will notice the difference, and a decent mic will instantly give your podcast a more professional feel. You don’t need to get crazy with a soundboard yet3. Here’s a few options:
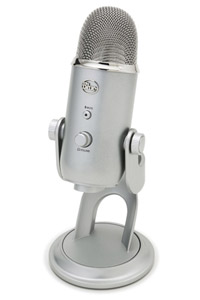 Blue Microphones Yeti
This is the mic I use. It’s a bit more pricy coming in at just over $100, but Amazon has it on sale several times through the year. This mic has 4 settings which is perfect for a any type of podcast you might want to do whether it’s a solo act, an interview, or a roundtable. The audio quality on this guy is great, and it couldn’t be easier to use.
Blue Microphones Snowball
This is the more budget friendly mic from Blue. It’s got great reviews and if it’s anything like the Yeti, I’m sure it has great quality.
Built in Mic
You can always start out with the built in mic. The audio quality isn’t terrible, but it is free. Eventually you’ll want to grow to an external mic with more features though.
Podcasting Software
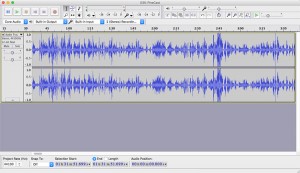
The next thing you’ll need is some quality audio recording software. There’s tons of options out there for audio recording. We’re going to cover Audacity in this guide because it’s free, it’s on Mac and PC, and it’s what I use to record my podcast. Plus it’s super easy to use. Let’s get started.
 Step 1: Download and Install Audacity
You’ve probably done this hundreds of times.
Step 2: Plug in your mic
Or if you didn’t buy an external mic, do nothing.
Step 3: Hit record
That’s really all it takes to get started. Now just talk for awhile about whatever interests you.
Step 4: Export an MP3
This will be uploaded to WordPress in the following steps.
Starting Your Podcast
![]() All podcasting apps really access when they serve your podcast to listeners is a specifically formatted RSS feed. Here’s where the PowerPress plugin from Blubrry comes in extremely handy.
All podcasting apps really access when they serve your podcast to listeners is a specifically formatted RSS feed. Here’s where the PowerPress plugin from Blubrry comes in extremely handy.
By installing the plugin and adjusting a few settings we can have a RSS feed perfectly setup for submitting our podcast to iTunes in a matter of minutes.
Once PowerPress is installed we can go to the new PowerPress admin menu on our WordPress dashboard and get everything set up. The first time you set things up you’ll be given the Simple Mode screen. This is fine for getting everything started, but if you want to get into more complex setups you can switch to Advanced Mode. And you can always switch back and forth to your heart’s content. So feel free to check the settings available on each.
I’d recommend setting up the Blubrry free statistics when you’re starting out. Just to get a general idea of some stats you can follow with your podcast. I’m still looking for some better stat tracking solutions, so I’d love to hear of any good ones in the comments.
Preparing Your Podcast RSS Feed for iTunes and More
First, you’ll want to give your podcast a name so people can find it, otherwise it will default to using your blog title. The next item you’ll see is the iTunes Subscription URL. You’re not going to have that yet. Once you get your first episode posted and submitted to iTunes, they’ll review your submission4, and once approved you’ll get a subscription URL via email. Then you’ll paste that here.
Next we’ll want to get some of the iTunes settings set up. The first two items, iTunes Program Subtitle and iTunes Program Summary, aren’t required, but they’re a good idea. We want to make these descriptive so people know what they’re getting out of our podcast. For the iTunes Program Subtitle use something sweet and short that further explains your podcast after the title.
Your iTunes Program Summary should use some of the keywords you’re looking to hit. For The PineCast, a local sports podcast I run with my brother and a friend, we’ve got the following:
The PineCast is a sports, movies, TV, beer, and video games podcast based in St. Louis, MO. Mostly sports though. Brought to you by ViewFromThePine.com, The PineCast features Steve, Jason, and David drinking and talking about sports and stuff.
Nothing crazy, but we get a few of our keywords in there so we can show up better when people search for St. Louis sports in iTunes.
Next you’ll want to set your iTunes Category. This is where your podcast will appear when a listener is browsing through iTunes trying to find great new content.
There are two more required fields we’ll need to fill out: iTunes Email and iTunes Image.
Your iTunes Email should be the email associated with the iTunes account you’ll be submitting the podcast through.
The iTunes Image is what people will see for your podcast when browsing through iTunes or listening to your podcast. The recommended size is a 1400 x 1400 pixel image in .jpg format. When you’re designing your icon keep in mind that it needs to look good both large and small. You want your listener to be able to easily pick out your show’s logo from a gallery of other podcast logos. So make sure it’s readable when at thumbnail size.
The final setting we’ll want to deal with for now is where to display an audio player on our site within our post content. This is really just a preference. You can easily display a media player above your post content, below the post content, or not at all.
Save your changes, and that’s it you’ll now have a podcast RSS feed at http://domain.com/feed/podcast/ that you can submit to iTunes.
On How Many Episodes to Include in Your RSS
One problem, by default our feed is only showing our blog default posts (episodes) per feed5. In order to change that so users can listen to more than our 10 previous episodes we’ll want to switch over to the Advanced Mode tab. From there select the Feed tab. You’ll see a lot of the settings we already set on this page, in addition to your special podcast only feed link, and a setting for Show the most recent number of episodes. Put whatever number you’d like in the box and you’re good to go. You can no show as many podcast episodes as you want in your feed. But do make note that values larger than 10 could cause feed timeout errors. So you probably don’t want to go too high.
Adding an Episode to Your Podcast
After you’ve recorded the first episode of your podcast, you’ll want people to be able to find it. This is done by creating a default WordPress post, but now you’ll see a few more PowerPress options at the bottom. A couple things to note: your post title will be your episode title in your feed, and the post content will be your episode description.
Once you’ve come up with an awesome episode title and some great keyword centric copy for your podcast episode, scroll down below the the content editor until you see the Podcast Episode field meta box. There’s really only one thing you’ll need here, the URL for your media file. So go ahead and add the .mp3 of your podcast episode to your media library, once it’s uploaded grab the URL for the file. Paste that into the Media URL field in the Podcast Episode meta box, and click Verify URL to make sure everything is good with your file.
Now publish your post and let your RSS feed do the rest of the work.
Adding Your Podcast Feed to iTunes
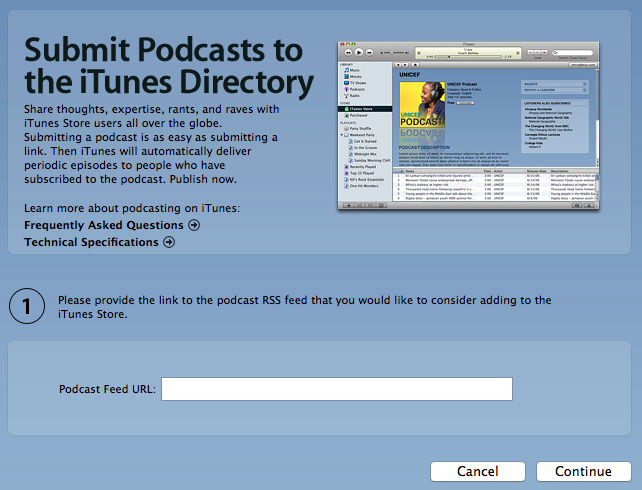
Now you’ll just need to take your podcast feed URL and publish it to the podcast network’s of your choice. In order to do that follow this link to publish your podcast to iTunes. Once that link opens up iTunes6, paste your feed URL into the “Podcast Feed URL” field and click continue. At the next screen, review your podcast information and, if everything looks good, hit Submit.
Now you’ll just have to wait a few days to see if your podcast gets approved by iTunes. I don’t know whose job it is to listen to every podcast submitted to iTunes, but I don’t envy them.
If you need more detailed instructions on publishing to iTunes, checkout Blubrry’s guide.
There you have it. If you’ve got any questions or tips I’d love to hear them in the comments.
Check out my WordPress podcasting theme, The Pine, available on Creative Market.
- Prime shipping, son.
- May I suggest this little guy?
- But if you do you’ll want an XLR mic.
- Usually around 3 days.
- Usually 10.
- if you don’t have iTunes, you’ll have to download it
