I’ve written about setting up local WordPress development environments using Vagrant and Docker. And both are excellent options with their own advantages.
Docker is a relatively new tool in my box but I see it being useful for spinning up quick sites at http://localhost. While Vagrant is a great tool for sharing dev environments among our team at Red8 Interactive and using custom domains like http://example.dev. But boy does it get slow to start once you have a lot of sites through VVV.
That’s why I’ve found myself defaulting back to MAMP Pro for a lot of my development work. So it’s probably time to cover that as a local WordPress development option.
Getting Started with MAMP Pro
There is one distinct difference between MAMP Pro and Docker / Vagrant. It costs money. Oh and it has a GUI.
To setup MAMP Pro all you need to do is head over to the website, download it, and install.
Setting Up a Host
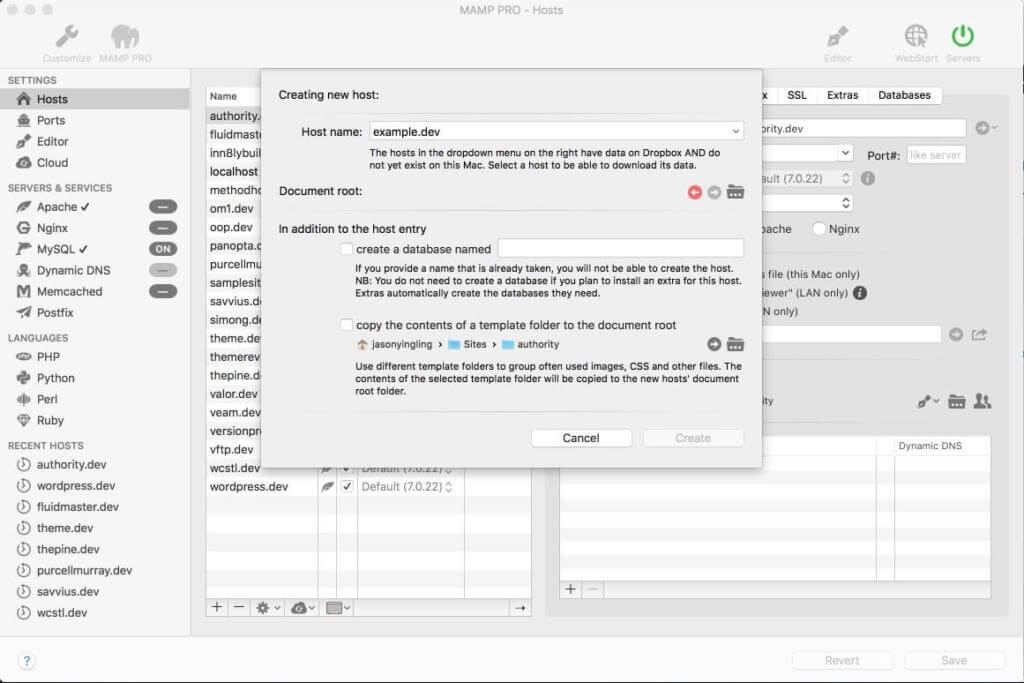
Getting a host setup for WordPress development on MAMP Pro is another quick process.
First, click the “+” under your list of hosts. Then enter the name for your sweet new development environment. I prefer using the .dev extension. But Chrome may screw that up soon.
Next you’ll want to set the path to the files for your site. If you haven’t already drop a fresh version of WordPress in your preferred directory1. Click the folder icon next to Document root and set the root of your WordPress install. This will be the folder containing your wp-config.php file.
Then select to have MAMP create a database for you and name that database. Alternatively you could create the database yourself from using phpMyAdmin. Then click Create and start your MAMP Pro servers.
Installing WordPress
The first step we’ll want to do is go into our WordPress directory and duplicate wp-config-sample.php and rename it to wp-config.php. Inside you’ll need to update the define('DB_NAME', 'database_name_here’); line to replace database_name_here with whatever you named your database during the MAMP Pro setup.
Next you’ll need to update define('DB_USER', 'username_here'); and define('DB_PASSWORD', 'password_here'); with your MAMP Pro database user and password. Creatively enough this is “root” and “root” out of the box.
NOTE: Never launch a site to a live environment with the database user and database password as root. Don’t user admin either. Or password. Make the something truly unique and generate a random string of characters for the password. You won’t need to memorize it.
Now that you have WordPress running on a snazzy local development environment and you entered your database credentials, you can navigate to the domain you set up earlier in the browser of your choice.
If everything worked properly you’ll get a WordPress screen allowing your to set your language of choice. Follow the prompts on screen and in seconds you’ll have a fully functioning local development environment. Neat!
https://giphy.com/gifs/LxPsfUhFxwRRC
Automation
Boy that was a lot of manual steps though wasn’t it. If only we could, I don’t know, automate it.
Well you can!
Matt Shaw over at Delicious Brains has a great guide for Automating Local WordPress Site Setup with Scripts. You’ll need the WP-CLI to get it all working in tip top shape and Tom McFarlin has a great guide on Installing WP-CLI with MAMP | Tom McFarlin.
